Vendor Directory Report
You can create a Vendor Directory (and many
other reports) using the Custom
Report definition feature. The
discussion below is a brief overview on how to create a sample vendor directory.
Depending on what you need, you could choose different fields for the
directory, different field formats, and different output formats (the example
uses Microsoft Excel output). See the topic Creating Custom Reports for details on how to create report definitions.
Be sure to read the discussion of custom
reports for in-depth information on how to use all the custom report
features.
To create a Vendor Directory Report:
-
From
the main Contents, select Reports > My Report Definitions.
The list of custom reports appears. (If there are no
reports, the No Data panel appears.)
- Click
New. The Create New Report Definition panel appears
(Figure 1).
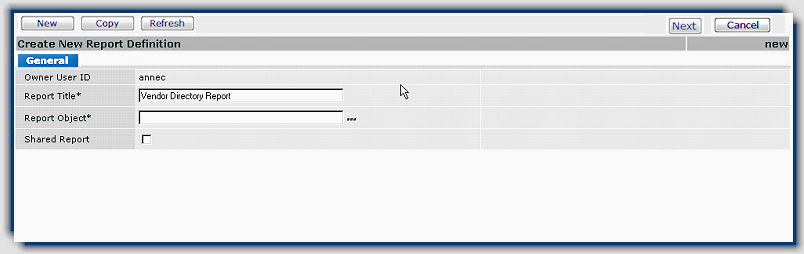
Figure 1 - Create New Report
Definition panel
- In the Report Title field, enter Vendor
Directory Report.
- Click the prompt next to the Report Object text box. A list
of Report Objects appears (Figure 2).
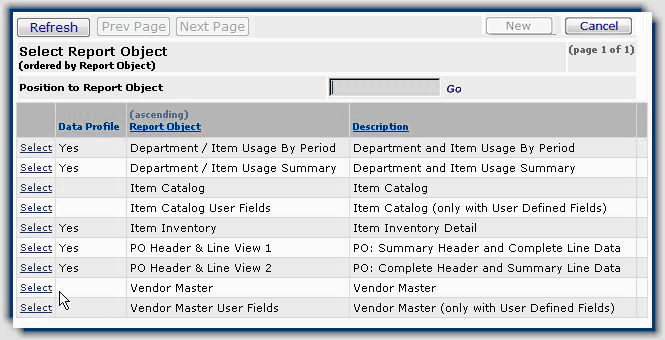
Figure 2 - Select Report Object panel
- Select Vendor Master.
- Click Next. The Report Definition field selection panel appears.
The field selection panel initially appears with the fields ordered by those most frequently used. Click the Field Name header to order the fields alphabetically (Figure 3).
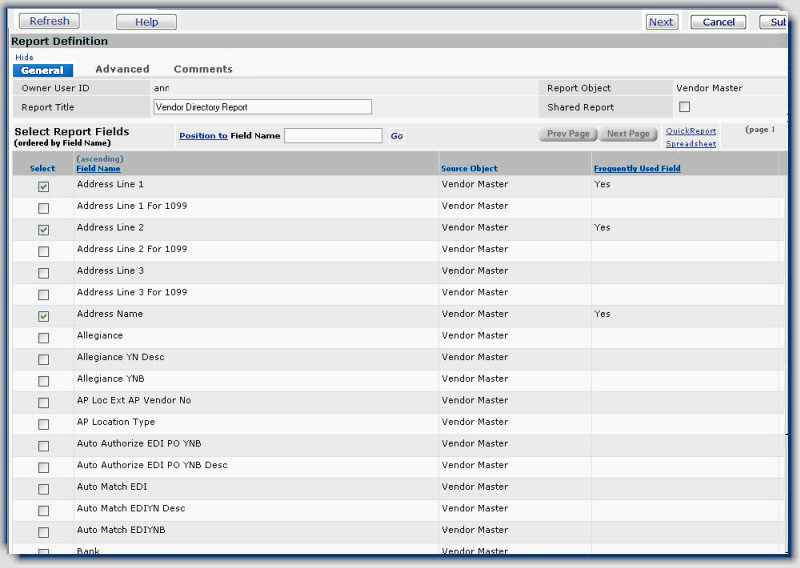
Figure 3 - Report Definition Vendor Master Fields for Selection.
-
On
the field selection panel, select the fields that you wish to include in the
vendor directory. (Use the scroll bars to view all the items on a
page. Click Next Page to
scroll through all the fields.) This example uses the fields below:
-
Address
Line 1
-
Address
Line 2
-
Address
Name
-
Buy
From Loc
-
City
- Cust
Svc Contact
- State
- Vendor
Name
- Vendor
No
- Vendor
Suspended
- Zip
Code
- When
you are finished selecting fields, click Next. The Report Definition tabbed panels appear with your chosen fields (Figure 4). Notice that an
outline of your report columns appears in the Preview box.
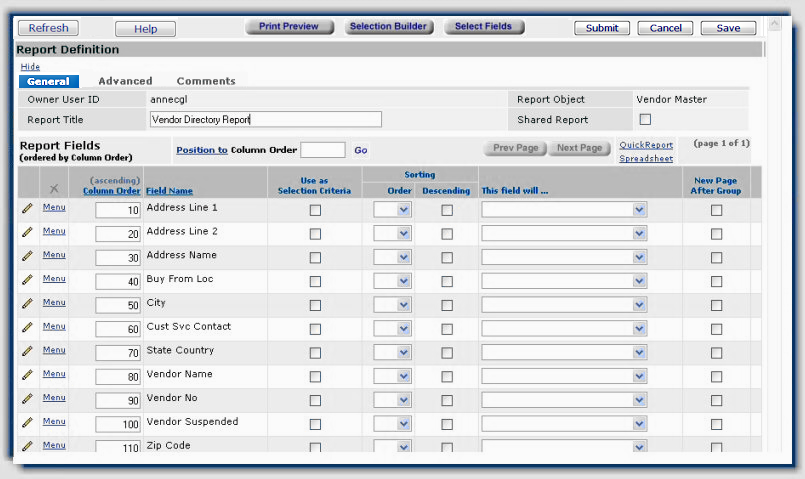
Figure 4 - Report Definition Panel
You
may wish to re-label some of the fields so that your report columns will be
easier to understand.
-
To change the label of any column in your report,
select Menu next to the field. The Report Field Definition format panel (Figure 5) appears.
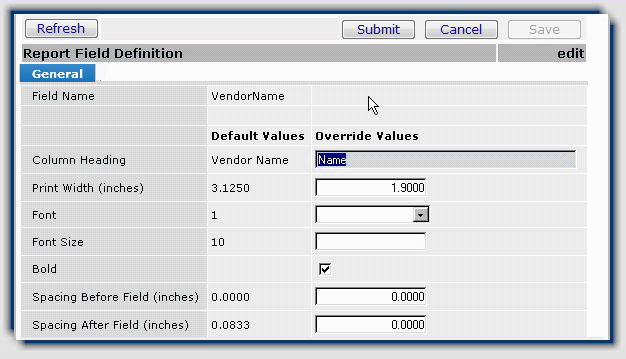
Figure 5 - Report Field Format Panel
-
Use
the format panel to change the way any of your columns are
formatted on the report. You can change the column name (Column Heading),
the width of the column (Print Width), the Font, the Font
Size, the spacing before and after the heading, and you can display a
column in bold type. In Figure 5 for the Vendor Name field, the Column
Heading is changed to just Name, the Print Width
value has been changed from 3.1250 to 1.9 inches. Also, Bold
is selected for the Name column values.
-
Configure
the other elements of the report. For the Vendor Directory,
-
Set
the Column Order. Click here
for instructions on how to use the Column Order field.
-
Set
the Order By value for each column to set the sort order as shown.
Click here
to learn how to use the Order By field.
-
If
the General and Advanced tabs are not visible at the top of
the Report Definition panel, move the small scroll bar at the top right to
display them.
-
On
the General tab, select Shared if you wish to make your report
available to others. Some users prefer to create and debug their reports
before sharing them. You can come back to the report definition later and
edit it to select Share. In this example, Share is not
selected.
-
Click
the Advanced tab. Click the drop arrow next to Output Report Format.
Select Excel Spreadsheet. (This example displays Excel output. If you
do not have Excel on your local computer, select another format.)
-
Click
Submit. The system creates your report definition, and returns you to My
Report Definitions list.
-
Click
Refresh. Your report appears on the list.
To run the Vendor
Directory Report:
-
Locate
the newly defined report on the list.
-
Next
to the report, select Menu > Print Report. ;A
confirmation panel appears.
-
Click
Submit. The system
informs you that the report has run. Your
report is saved in My Archived Reports, but you can also view it
immediately from My Report Definitions.
-
On
the My Report Definitions list next to the report you have just
run, select Completed Reports.
-
Click
the report name. The system launches an Excel spreadsheet
containing your report.
Copyright © 2023 by Premier Inc. All rights reserved.