Department
Master Quick Report
The Department Master Quick Report lists each
department in your organization, ordered by your choice of category: Department
Number, Department Name, Charges to the department,
Pick Cycle Code or Priority. The report shows charge
information for the departments: Charge To Organization, Charge
To Dept, Department GL Segment, whether the department is Active,
the Buyer for the department, the Department Head; and other
data.
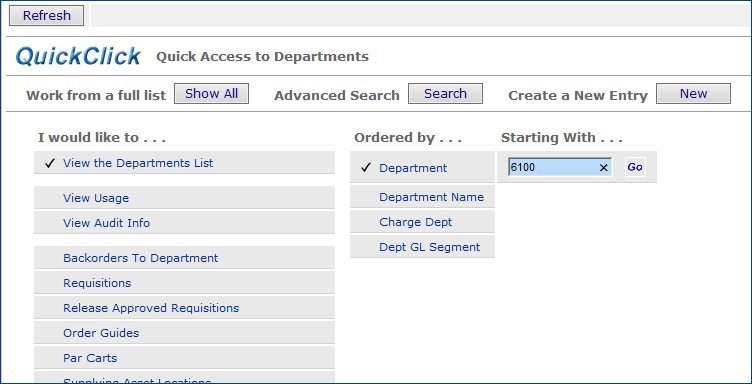
To create a Department Master Quick Report:
- From the main Contents, select Requisitioning
> Department. The Department Quick Click menu appears.
- Select the order and starting point for the
department's list. The figure below shows Department
number "6100" as the first department.
- The system displays the department
information, ordered beginning with department "6100".
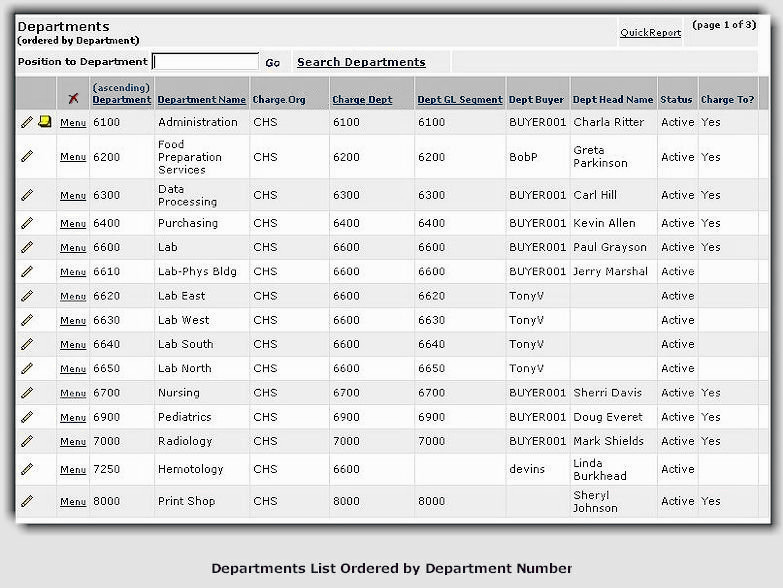
- Click Quick Report in the upper right of the
list. The Department Quick Report appears.
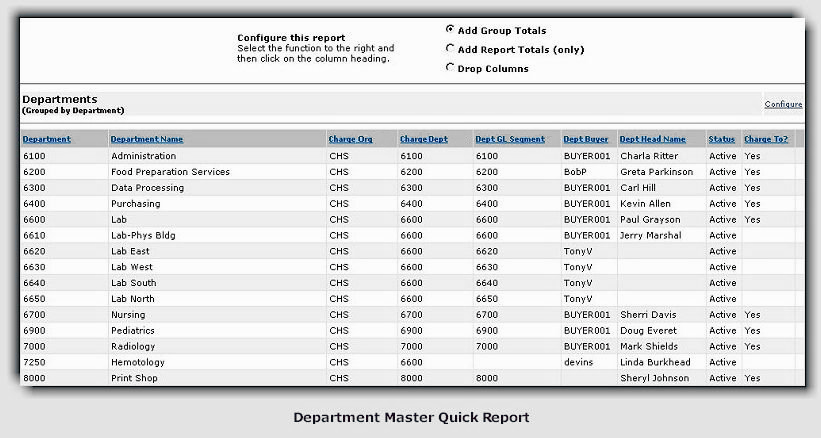
-
To get a count of the items in a column, click in the Add Report Totals
bullet. Then, click on the underlined column heading.
- To count groups in a column for each row:
- Click the open bullet next to Add Group Totals.
- Click the names of the columns for which you want a
total count in each row. The totals appear under each row of the column.
-
To remove a column, click in the Drop Columns bullet. Then, click the underlined column heading. The column disappears from
the report.
Note: You can undo changes that you made with
the Configure menu by clicking View > Refresh on the browser's
toolbar.
-
To turn the Configure menu on, or off, click Configure.
-
To format your report for
printing, select File > Print Preview from the Microsoft Internet
Explorer toolbar. The report appears as it will look when printed.
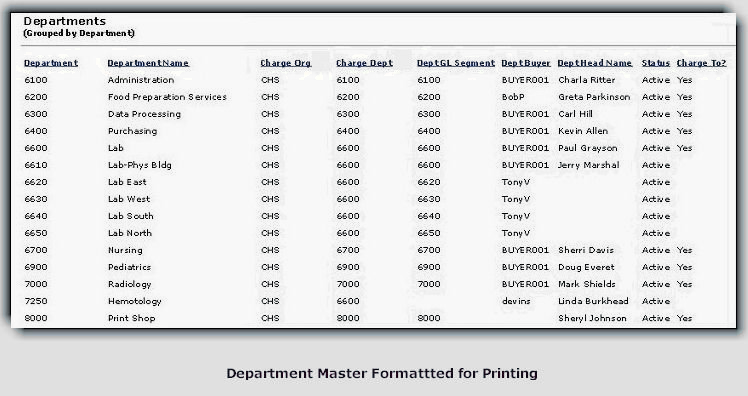
- Click Print. The Print panel appears.
You can select the printer for your report, and, by clicking Properties,
you can specify the Orientation on the page as either Portrait
or Landscape output. (Landscape prints pages the on the
"long" side, often useful for wide reports.) See To
print a Quick Report for more tips on printing.
Copyright © 2023 by Premier Inc. All rights reserved.